December 5, 2012

Vintage Blouse - The Muslin

I'm not the type for classical blouses, but having only t-shirts to wear with jeans is quite boring, so I think I'll have to make some nice tops. And I found this nice vintage Simplicity pattern which I really like. I want to make version 1, but with the wider neckline from the other versions, because the pattern is used and the version 1 neckline cut away, and without the shawl, as I don't have enough fabric.

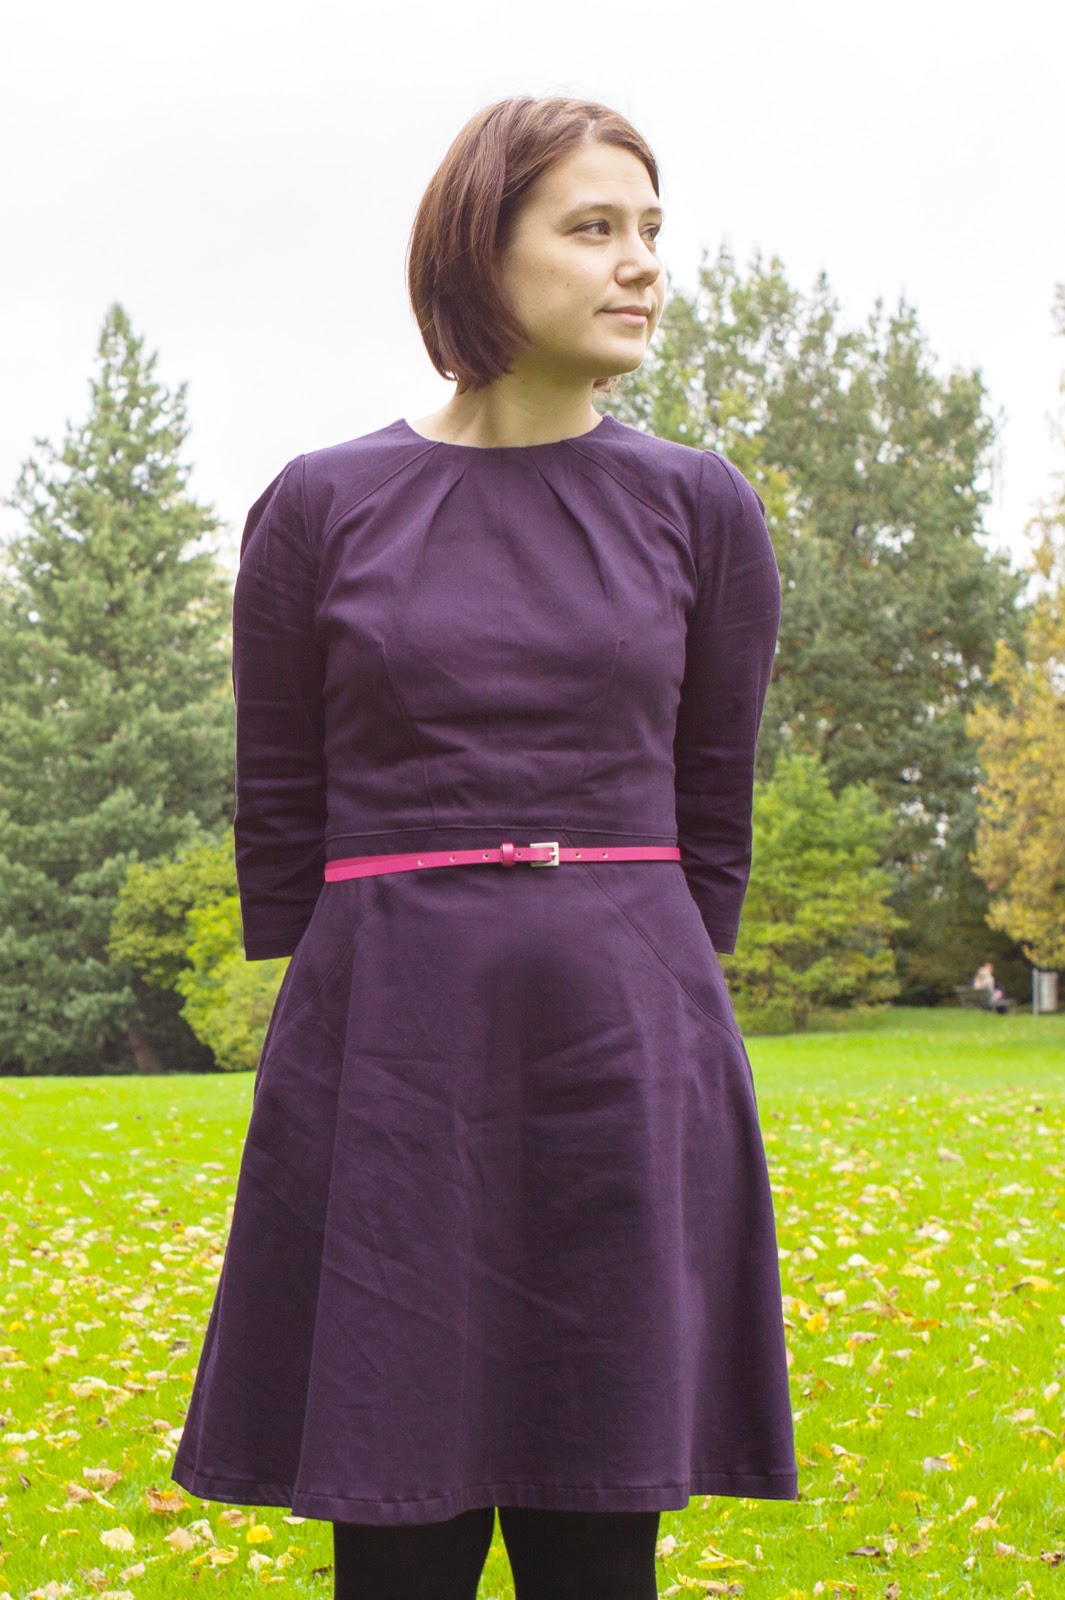
Klassische Blusen stehen mir leider überhaupt nicht, aber zu Jeans immer nur T-Shirts zu tragen, wird mit der Zeit auch etwas langweilig. Und so habe ich mich sehr gefreut, diesen alten Schnitt gefunden zu haben. Mein Plan ist Version 1, aber mit dem weiten Ausschnitt der anderen Versionen (der Schnitt ist gebraucht und dabei wurde der engere Halsausschnitt leider abgeschnitten), und ohne den Schal, mangels Stoff. 


Unfortunately, the pattern is one size too large, so I had to grade it down a bit, which wasn't much of a problem except for the kimono sleeves. I still don't know if I did it "the right way". As I wasn't too sure about the fit of a vintage pattern, especially with that grading, I decided to make a muslin first. But I don't have any test fabric in my stash at the moment, and it was the weekend and too late to buy some, so I decided to make a wearable muslin from a cheap grey cotton poplin.

Leider ist das Schnittmuster eine Nummer zu gross für mich, also musste ich ihn etwas verkleinern. Das war aber kein Problem, mit Ausnahme der Kimono-Ärmel; ich weiss auch nicht, ob ich da richtig vorgegangen bin. Da ich mir mit der Passform bei so einem alten Schnitt nicht sicher war, und wegen der Schnittverkleinerung, habe ich lieber ein Probeteil genäht. Ich hatte aber keinen Teststoff mehr, also habe ich eine günstige, graue Baumwollpopeline aus meinem Vorrat genommen und ein "tragbares" Teststück daraus gemacht. 


There is still room for improvement, but I already love wearing the muslin as a new blouse!
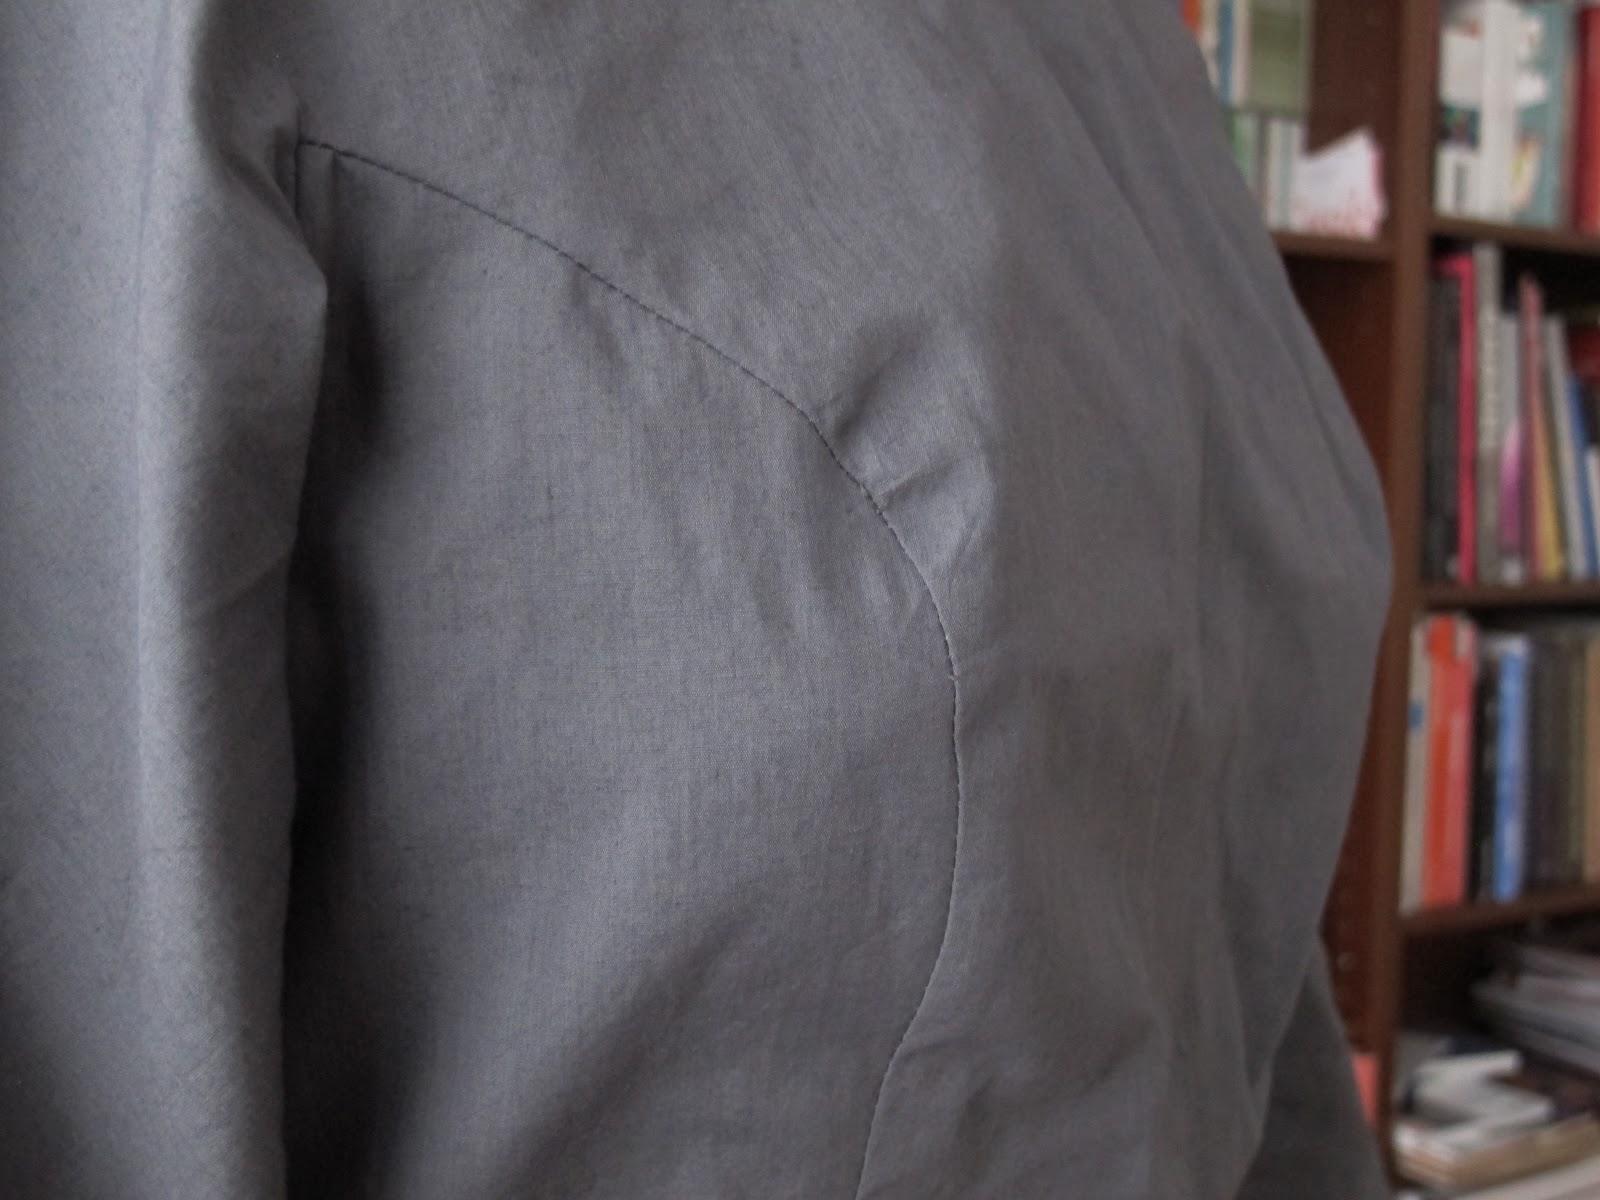
Sewing the kimono sleeves was a bit tricky first, but then those pesky corners came out quite nice.

Das muss natürlich noch verbessert werden, aber ich denke, das Probeteil ist so durchaus schon tragbar! 
Die Kimono-Ärmel waren erst etwas knifflig, aber dann sind die Ecken doch ganz gut rausgekommen. 


The middle front part makes some slight bulges at the princess seam, but that should be easy to remove in the final garment.

Das mittlere Vorderteil wirft allerdings noch leichte Beulen an der Teilungsnaht, aber das sollte bei der endgültigen Bluse gut zu beheben sein. 


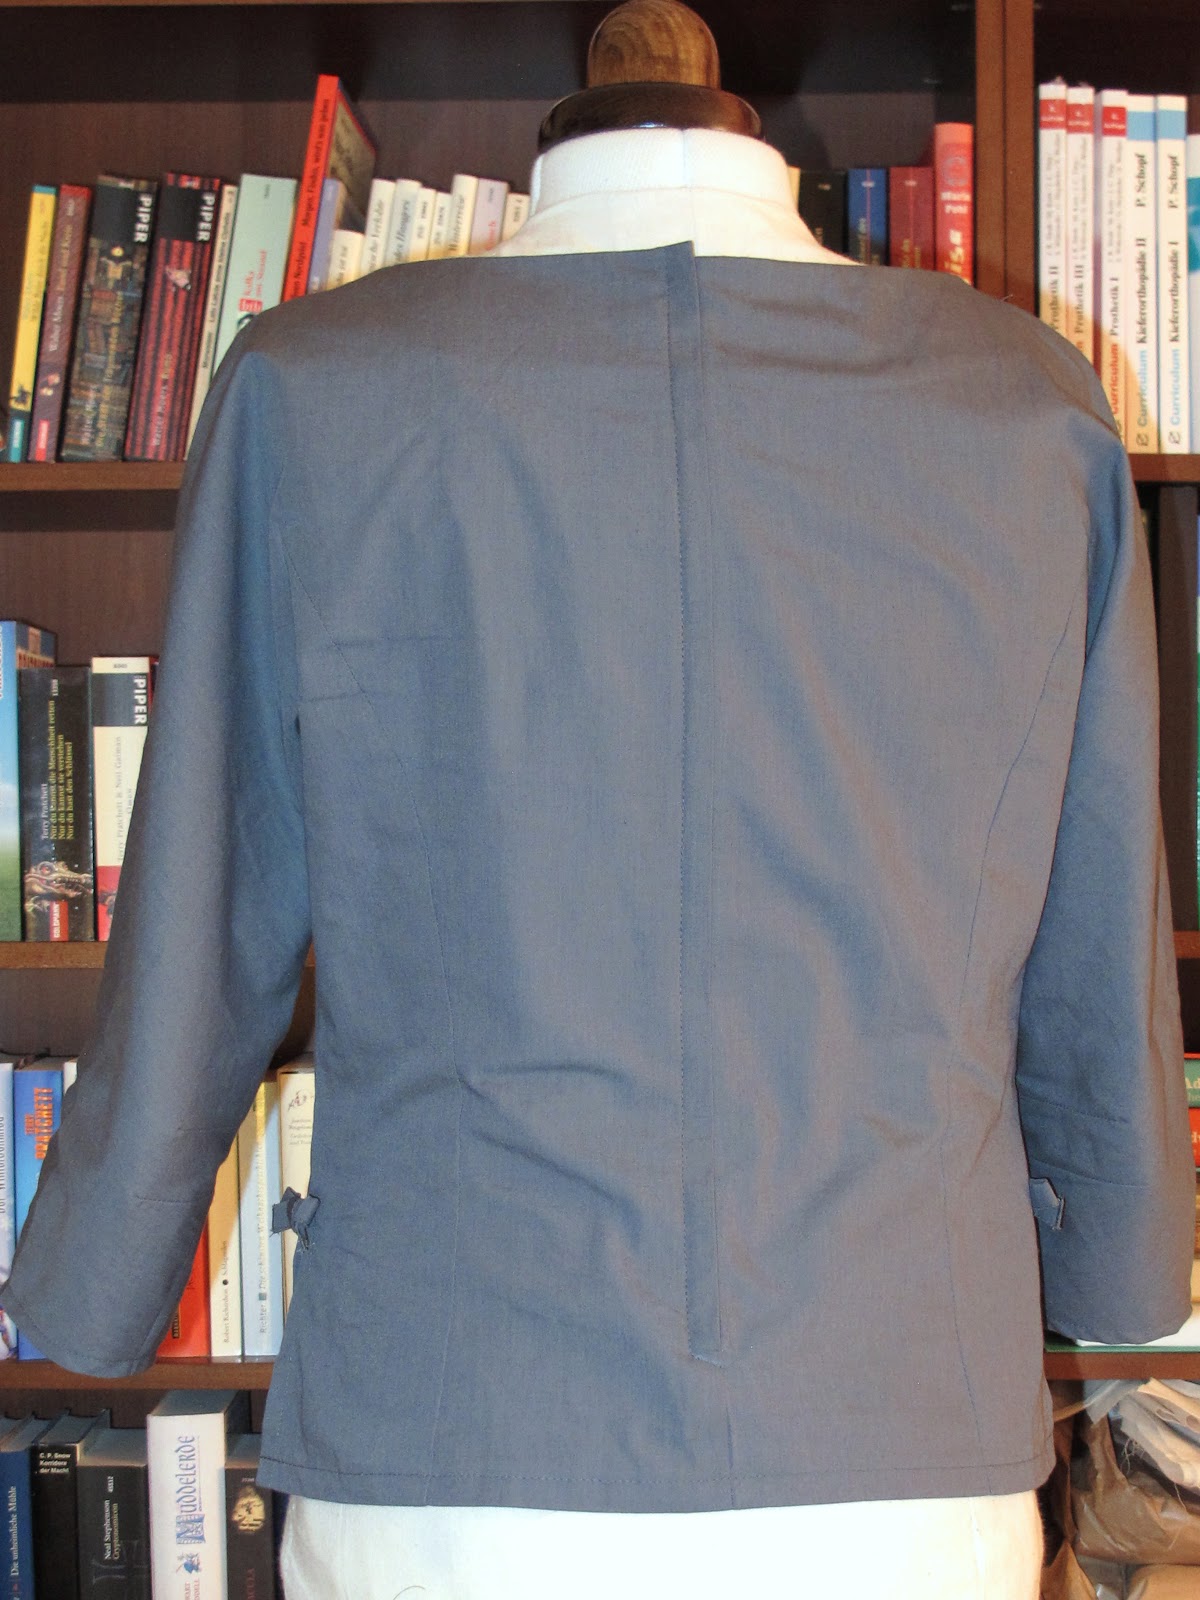
Maybe I should move the shoulder seam a bit more to the front to better fit my forward shoulders. But the overall fit seems to be quite nice, and the waist sits perfectly at its place.

Die Schulternähte sollte ich evtl. noch ein bisschen weiter nach vorne verlegen, weil meine Schultern auch sehr weit nach vorne gehen, besonders die rechte. 


For pattern grading, I measured the bust and waist width of the pattern very carefully. What I didn't think of was the hip width. Although the blouse does not reach the hips (maybe it's a bit short anyway, although I lengthened it already), the muslin was to tight below the waist. Never mind, I let open slits at the bottom of the side seams, which I decorated with two little bows.

Bei der Schnittverkleinerung habe ich die Brust- und Taillenweite auf dem Schnitt sehr genau nachgemessen. Was ich vergessen habe zu messen: die Hüftweite. Die Bluse geht zwar nicht bis zu den Hüften (sie ist sowieso ein bisschen arg kurz, obwohl ich sie schon um ca. vier Zentimeter verlängert habe), aber die Probebluse ist doch deutlich zu eng unterhalb der Taille. Fürs Probeteil aber kein Problem, ich habe einfach seitliche Schlitze offen gelassen und diese mit zwei einfachen Schleifchen verziert. 


The blouse is supposed to be closed with buttons at the back. I love this feature, but for the muslin I went the easy way and inserted a lapped zipper instead. I didn't have any matching buttons, anyway!

Die Bluse wird nach Schnittanleitung eigentlich mit Knöpfen im Rücken geschlossen. Ich hatte aber keine Knöpfe da und fand dies auch zu viel Aufwand für ein Probeteil, das vielleicht nie getragen wird, und habe statt dessen einen überlappten Reissverschluss eingenäht. 


I'm so happy that the muslin did turn out as an actually wearable garment! Isn't that nice: getting two new garments by sewing one pattern!

Im Grossen und Ganzen bin ich ziemlich zufrieden mit der Probebluse und habe sie schon mehrmals getragen. Super, so habe ich gleich noch ein Oberteil mehr!

December 3, 2012

Winter Sleep

The first thing I made when I had bought my first very own sewing machine, about eight years ago, was a pair of pajamas for my husband (who was my boyfriend back then). They turned out great, but now they are quite worn out, so I had to make him new ones.

Das Allererste, was ich genäht habe, nachdem ich mir meine erste eigene Nähmaschine gekauft habe, war ein Pyjama für meinen Mann. Das ist jetzt acht Jahre her, und der Pyjama ist ziemlich abgetragen, also habe ich ihm zwei neue genäht. 


For the t-shirt, I used a t-shirt pattern from the German Burda site, but then I was a bit angry with myself, because I could have also taken the Pete shirt pattern from the English site for free.
For the pants, I used only the pants part from a pajama download pattern on the German Burda site.

Das Tshirt habe ich mit einem einfachen Shirt-Schnitt zum Download auf der deutschen Burda Seite genäht. Danach ist mir aufgefallen, dass es auch ein kostenloses Schnittmuster für ein Herren-Tshirt gegeben hätte, nämlich "Pete" von der englischen Burda-Seite. Die Hosen sind von einem Pyjama-Einzelschnitt, den es auch auf der deutschen Seite gibt. 

I found a nice patterned cotton for the pants, and made the shirts from cotton jersey. It is hard to see on the photos, but the green pants have small white and red stripes, so I chose a red jersey for the shirt, and added a front pocket with a facing made from the pants fabric.

Die Hosen sind aus einem schönen, griffigen Baumwollstoff, die Tshirts aus Baumwolljersey. Die grüne Hose hat schmale, grüne und weisse Streifen, deshalb habe ich hier ein rotes Tshirt dazu genäht. Leider sieht man die Streifen auf dem Foto sehr schlecht, um diese Jahreszeit ist es aber auch schwierig, ein bisschen Licht zu erwischen! Auf das Tshirt habe ich noch eine Brusttasche aufgenäht, mit einem Besatz aus dem Hosenstoff, damit alles besser zusammen passt. 


For the second pair, I used a blue cotton fabric with white an light blue squares, and the shirt is also light blue. During this time of the year, it is difficult to catch a moment with enough light to make photos! I also monogrammed the shirts on the front, just for fun, because my sewing machine can sew them!

Der zweite Pyjama hat eine dunkelblaue Hose mit weissen und hellblauen Karos darauf, und das Tshirt ist auch hellblau. Dann habe ich noch in beide Tshirts ein Monogramm aufgenäht, nur zum Spass, und um die Buchstabenfunktion meiner Nähmaschine auch mal zu nutzen. 


But I didn't add any pockets to the pants, it's too often that I find forgotten handkerchiefs in the washing machine! ;)

Die Hosen haben aber keine Taschen bekommen, damit in der Waschmaschine nicht so oft Papiertaschentücher versehentlich mitgewaschen werden! ;)

November 22, 2012

Little House on the Prairie

Some weeks ago, I found a cotton plaid shirt dress in a store which I liked, but the fit wasn't good. Luckily, I'm able to make one by myself!
Im Urlaub vor ein paar Wochen habe ich in einem Geschäft ein kariertes Blusenkleid aus Baumwolle anprobiert. Es sah gut aus, aber es hat leider nicht richtig gepasst. Glücklicherweise kann ich mir aber auch selber eins nähen!


However, when I bought the fabric, I was a bit worried that the finished dress might look too much like "The Little House on the Prairie", but during construction I found that the comparison wasn't too obvious. Until a friend came for a visit, saw the almost finished dress on my dressform and shouted out: "Oh, how nice, that looks like from the little house on the prairie!" And now, the dress has its name!
Beim Stoffeinkauf war ich etwas beunruhigt, ob das Kleid in dem Stoff nicht etwas zu sehr nach "Unsere kleine Farm" aussehen würde. Beim Zusammennähen fand ich aber, dass der Vergleich doch nicht zu auffällig wäre. Bis dann eine Freundin zu Besuch kam - sie sah das fast fertige Kleid auf der Schneiderbüste und rief sofort: "Oh, das sieht ja aus wie aus unserer kleinen Farm!" Da hatte ich es also, und das Kleid hat seinen Namen weg!

I used a pattern which I already had made a dress from about a year ago, it is Burdastyle magazine 1/2010, no. 109, with modifications. I'm not a big fan of the first dress, I think I used a wrong fabric for it. It is in a very dark blue and also a bit heavy, so the dress looks very conservative.  Oh well, not every self-made dress can be a favorite, I suppose.
Das Schnittmuster hatte ich bereits: ich habe vor etwa einem Jahr schon mal ein Blusenkleid genäht, nach dem Schnitt 109 aus der Burdastyle 1/2010, mit kleinen Änderungen. Mit diesem ersten Kleid bin ich nicht allzu glücklich, ich denke der Stoff ist dafür etwas zu dunkel und wohl auch zu schwer, so dass das Kleid sehr ernsthaft und etwas bieder aussieht. Nun ja, es kann wohl nicht aus jedem selbstgenähten Stück ein Lieblingskleid werden. 


As I already knew the pattern, the construction of the prairie dress went along very quick and easy - until I made a big, big, silly mistake. 
I've got narrow shoulders, but don't make the alteration for this fitting issue on the paper pattern. Instead, I finished the dress without the sleeves, then I put it on and marked the seam lines where the sleeves go in directly on the the dress on my body. Then, I wanted to cut away the excess seam allowances, but this time, on the right front piece, I cut directly on the marked seam line, from the shoulders down over the whole front, until I recognized my mistake. What to do? I didn't have enough fabric, nor the patience, to start with a front piece all over again.
Das Zusammennähen ging einfach und schnell - bis ich eine Riesendummheit gemacht habe. 
Für meine schmalen Schultern muss ich die Schnitte immer abändern. Diese Änderung mache ich aber nicht am Papierschnitt, sondern ich nähe das Kleid normalerweise fast fertig und probiere es vor dem Einsetzen der Ärmel an. Dann markiere ich die Nahtlinie, an der die Ärmel eingepasst werden müssen, direkt auf dem Kleid an mir selbst. Das habe ich auch dieses Mal so gemacht, aber als ich dann am Vorderteil die überschüssige Nahtzugabe abschneiden wollte, habe ich aus Versehen statt dessen an der markierten Nahtlinie entlang geschnitten. Ich hatte schon die Nahtzugabe fast am ganzen rechten Vorderteil abgeschnitten, bis ich den Irrtum bemerkt habe. Dann aber war der Ärger gross! Ich hatte weder genug Stoff, noch die Geduld, noch einmal das rechte Vorderteil neu zuzuschneiden und einzunähen. 

So, at first, I stitched with a narrow zigzag over the wrong cut to have the seam allowances back to the front piece, to be able to easier handle it. The I set the sleeve in even a bit more located to the middle front, so that the stitching line was just about 2 millimeters away from the mistaken fabric edge.
Darum habe ich als erstes mit einem schmalen Zickzack-Stich die abgeschnittene Nahtzugabe notdürftig wieder reponiert, und den Ärmel eingesetzt, und zwar etwas weiter in das Vorderteil hinein als eigentlich geplant war. Die neue Nahtlinie ist jetzt ungefähr 2mm vom irrtümlichen Einschnitt entfernt. 


Then, after the sleeve was set in, I covered the cutter line again with a zigzag stitch, to fix it also with the seam allowance of the sleeve.
Nachdem der Ärmel eingesetzt war, bin ich nochmal mit einem Mehrfachzickzack-Stich über den Einschnitt drübergegangen, zusammengefasst mit der Ärmel-Nahtzugabe. 


That's it. So far, nobody has noticed that the right sleeves sits more to the front than the left one, and it still is comfortable for me, too. I just hope it will hold!
Bis jetzt hat - trotz des karierten Musters - keiner gemerkt, dass der rechte Ärmel vorne weiter zur Mitte sitzt als der linke. Und er ist trotz allem noch bequem. Ich hoffe nur, dass das Ganze hält!

For the buttons, I found the perfect ones - until I came home and noticed that they are actually made of plastic, instead of metal as I had thought. When I noticed that, I was a bit annoyed, but then again, if I was being fooled thinking they were made of metal, everybody else will think that, too!
Ich hatte die perfekten Knöpfe gefunden - zu hause habe ich dann gemerkt, dass die Knöpfe nicht wie angenommen aus Metall sind, sondern aus Plastik. Wie ärgerlich! Dann habe ich mir aber gedacht, dass wenn schon ich das nicht gemerkt habe, dass die Knöpfe nicht aus Metall sind, dann fällt es auch niemandem anders auf. 


Despite evoking unintended associations with an old tv-series, it still is a very comfortable dress, which I like to wear. I'm even thinking about making another one next year, maybe this time with narrow sleeves, and hopefully without cutting the wrong markings.
Trotz der ungewollten Assoziation mit einer alten Fernsehserie mag ich das Kleid sehr gerne. Es ist wirklich sehr bequem zu tragen und warm genug. Ich überlege sogar, irgendwann noch eines zu machen. Allerdings werde ich dann wohl schmalere Ärmel einsetzen. Und aufpassen, wo ich einschneide. 


November 13, 2012

In Fabric Shopping Heaven

I'm back from vacation in California now, and I enjoyed it a lot, hiking in the Yosemite and Sequoia National Parks, but the fabric shopping has also been a very nice part of it!

I originally intended to only buy some silk organza. You cannot get it anywhere around here (at least I don't know any place you can get it). So, as I would have to order it at some US-online shop anyway, I thought it might be practical to buy it instead when I get there.

I spent some time in San Francisco, and it turned out that there was a really good fabric shop right in the center and near our hotel which should sell it, so I went there. In the end, I visited this shop three times: on my first day (it was the first thing I did there!), and then again twice on my last day (there was some tiny little space left in my suitcase, you know...). I liked Britex Fabrics so much, I felt like being in fabric shopping heaven!


And I've never seen such a big fabric shop before. There are four floors, each of them stuffed with the most beautiful fabrics. I wanted to buy almost everything they had, but unfortunately, this is not possible if you have little space in your suitcase and a limited budget to spend.

But, apart from the six yards of silk organza, I bought some nice fashion fabrics.

First, there is a nice Missoni knit fabric, which will certainly be a challenge to sew it up, especially as I still don't have enough experience with knit fabrics. But look at those colors! Isn't the fabric irresistible?


Then, I bought a wool knit fabric with a very interesting pattern:


What looks like circles at first glance is in fact the skirts of dancing women, view from top. This fabric is not so much the colors I usually wear, but I couldn't resist the fanciful pattern and the light, but warm and cozy wool fabric. It will make a great dress or top for the swiss winter!

 I also bought two cotton voiles, which will have to wait until next summer to be sewn up into dresses or blouses. I really like the colors and patterns!


I will not be starting right away with one of those fabrics, still thinking about the perfect patterns for them, and in case of the Missoni knit, I'll wait until I have more experience to sew it. Either that, ore more courage! But the nice thing about bringing fabric from vacations is that whenever you wear the garment/accessory you made from the fabric, you are thinking yourself back to vacation. That makes it garments with a special bonus "relaxing feature", don't you think?


October 24, 2012

(No) Fun with Stripes

I wanted to get some practice with my overlocker/cover machine, which I had intentionally bought to sew knit fabrics with. So I bought some jersey fabrics and made some t-shirts, in some sort of "mass production". I used pattern no. 112 from burdastyle magazine 2/2010.

I started with a t-shirt with stripes...


did you see the iron-on shark on it? The blurry blue color reminds me of water, and I had this iron-on motif lying around, so I applied it to the t-shirt, just for fun.

There was some fabric left, quite enough to make a sweater for little T., the baby son of a friend of mine.


Then I made another striped t-shirt, which turned out to be better than the first one (unfortunately, it came out a little bit too short, but that's not a problem, I just have to make a skirt to go with it).


Then I made a t-shirt without stripes...


(I'm not too sure about that fabric pattern and colors, but at least it is comfortable to wear at home.)

... and one more sweater for little T. (I couldn't resist buying this cute fabric with those little owls).


The next one is one of my favorites!


And one more with stripes... at this time I was already a bit bored by the pattern, and so I didn't care anymore about matching the stripes.


The last one with stripes, at least it isn't blue like all the others!


It's pretty cool to wear self-made t-shirts with stripes. But that's it. I was pulling my hair out when I did the neckline bindings. I used the cover mode of my overlocker with a chain stitch.

First, the machine used to skip stitches every few inches. Which is really bad because the chains on the back side of the seam are not properly linked, to the seam will probably open one day.


I could solve this problem by using a brand new, special cover stitch needle.
But still, I find that binding necklines is not easy at all. Sometimes the whole neckline stretched out, but there are also shirts where the neckline is slightly gathered under the binding. Even when I just added a fabric stripe to turn it in. And the overlocker seems to have problems crossing thicker parts with more than two fabric layers.


For the orange shirt, I wanted to apply some real cuff fabric, and I did, but it stood from the neckline in a really weird way, so I turned the whole thing to the inside of the shirt and now it looks better. Still, this isn't what the plan was!


The blue-pink shirt came out the best concerning the neckline.


But still, the seam is wonky and not really nice. And the stripes are not matching at all.

This was another problem I struggled with: I didn't get the stripes to match perfectly. They were all nicely pinned in place, but under the foot of the overlocker, the lower fabric layer somehow goes faster, and everything is shifting. It was the same with the differential feed turned off. And it wasn't much better when I hand basted the seams first.

Oh well, at least it's only t-shirts! I guess it will go better with more practice. But I think that for the next project, I will return to sewing nice and easy-to-handle wool fabrics!

October 15, 2012

Finally finished: the (not quite) red dress!

While being really in a big delay, I finally finished the "red dress" from the Cose Conmigo by Sonia of La pequena aprendiz. But, as I don't like to wear red colored garments, mine is not red, but purple.


I have to admit that I didn't follow Sonia's instructions very exactly. As you can see, I also made a modification of the skirt part. The original pattern, Burda 8/2012, Nr. 121, has a slim pencil skirt. But I usually don't wear these, and I felt very unsure if such a slim skirt would be flattering on me. 


So I modified the skirt pattern and turned it into an A-line skirt. Which wasn't difficult at all. In case you want to make that dress with an A-line skirt, too, I made some bad sketches to show you the steps. 

The original skirt tapers down at the hem, so the first step was to make the side seam perpendicular to the hem line. I also drew some vertical lines (only to the bigger pattern part) and cut them, starting at the hem, but stopping cutting right before the end of the line.


Then I spread the bigger skirt part, so that the upper seam line matched up with the smaller skirt part while staying flat. 


Which left me with a bump at the side of the smaller skirt part, which I just cut away. That's it!

As the pattern is for tall sizes and I'm really short (I even have to shorten patterns for petite sizes!), I also had to shorten the whole thing. And of course I made the usual adjustments which are always the same for Burda patterns, so by now I can do them even without making a muslin: forward shoulder adjustment, narrow shoulder adjustment, and swayback adjustment. Some paper-and-scotch tape work!


I didn't want the dress to become too warm, so I used a cotton fabric, which unfortunately wrinkles a lot. But it feels better on the skin than some synthetic lining fabric, so I decided to only line the skirt (so that it will not clinch my tights when worn) and leave the bodice as it is, with a facing at the neck. 
I made a machine rolled hem at the top of the lining skirt and attached it at the waist with a row of topstitching. It does not look very even inside, but nobody will see it. 


See? I used a bright pink lining fabric, which will never be seen as well, but I like it nevertheless. 

For the zipper, I could not find a matching invisible zipper the pattern instructions call for, so I made a center back lapped zipper again. I just love them so much!


Looking at the photos, I think I should also add some belt loops at the sides, as the belt tends to fall down a bit...


Thank you, Sonia, for the nice Cose Conmigo, and for inspiring me to make that dress! And, although it is not red, I call it the "vestido rojo" by myself, thinking of you and your great blog! Besitos!


September 13, 2012

One More Summer Dress Finished

I finally finished my last summer dress for this year right in time to wear it for the last warm day.


It was too cold to wear it without a cardigan, though.


I have to say that I'm not completely happy with the dress. I'm not sure if a dress with small straps and no sleeves is a flattering style on me, and I feel kind of naked in it. I do love the fabric, but it feels a bit too bright and colorful (a friend told me that this is just because autumn arrives, and that I will love the colorful dress next spring). But the worst is that it doesn't fit right in the bodice, and I didn't know how to solve this fitting problem.


See how the bodice wrinkles at the side seam? It's not so much on the left side seam, but for some reason, at the right side it's really awful. I spent a whole day ripping, pinning, basting and ripping again, with no success. The wrinkles stayed as they are, they didn't even change a bit. In the end, frustrating as it was, I decided to just leave the wrinkles and finish the dress nonetheless.

I set in a handpicked zipper at the center back,


and I lined the bodice with cotton voile. The bodice is also underlined with silk organza.


For the shoulder straps, I used the same bias taping as for the "piping", but I inserted silk organza straps to keep them from stretching out.

Well, I will see how I like the dress next spring, for the moment it is too cold to wear it, anyway!


And now I'm off to start, a bit late, with my vestido rojo. I already traced the pattern!
Related Posts Plugin for WordPress, Blogger...